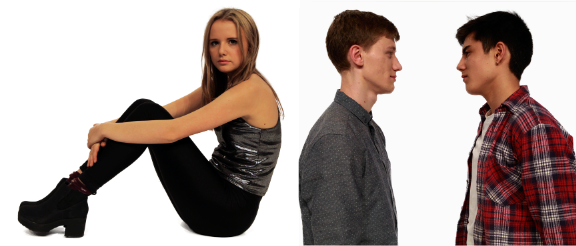
Hi! Welcome to my A level media blog. My name is Molly Sullivan (0816).

I'm in Group 4 with Maisie MacGregor (0506), Mari Leach (0440), and Ellie Brackpool (0100)

You can navigate my blog by using the column on the right hand side where you will find the following labels:
A2 Prelim, A2 Research and Planning, A2 Production and also a link to all of the work I did for AS.
There's also a link to the Latymer music video blog as well as a live link to the group's Facebook group.

Click here to access the group's Facebook page.

Thank you and I hope you enjoy my blog!

Our Music Video

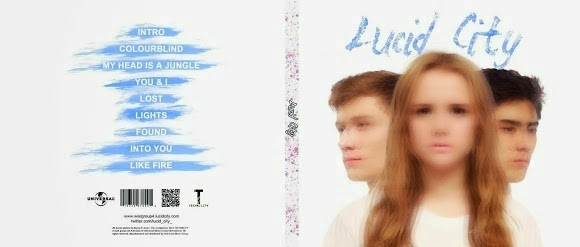
Digipack

Digipack
Front and back cover of the album.

Digipack

Digipack
Inside covers of the album

Click To Enter Our Website

Friday 25 October 2013

Sweded Project: The Dark Knight Rises

For this sweded project I was in a group of three with Mahalia and Alice and after some debate we decided to swede the popular Christopher Nolan film The Dark Knight Rises. As part of our marketing campaign we decided that making a trailer would be an effective way of spreading the word about our upcoming film.
We filmed our trailer at the same time as our film but we released the trailer onto our social networking pages the week before the release of the film.


Dark Swede Rises Twitter


We have also created a twitter page for our film to spread more news about the film and updates on filming, managing to gain over 300 followers over several days.

Another marketing technique we used was to create an effective and dramatic poster to make people around our school aware of the film and that it was something to look out for. I think that our poster looked really good and was a good representation of the film we created as well as staying close to the original.


Another extra clip that we filmed was an exclusive interview with our main three cast members all playing another character as the actor. For example, Gavin who played Batman played the role of a method actor in our interview and refused to believe that he was anyone but Batman himself.


Finally, the most important video of all - our finished swede:

THE DARK NIGHT RISES SWEDED FILM

To summarise this project I would like to add that I really enjoyed each aspect of creating a sweded film, especially the production of the main film itself. We came into school on a day which we had no lessons so that the school would be relatively empty which was useful as we had more space and time to film. I am really pleased with our final product and I thoroughly enjoyed this project and working with the members of my group.

Sunday 13 October 2013

Dexter Evaluation


Summarise the conventions of title sequences that were most important to this task.

Title sequences are important as they give credit to the people who worked hard to create the programme/film that you are about to watch. The rules behind title sequences are very strict and so it is important to give credit to all of the right people who were involved. It is also important to make the titles themselves look good, they cannot look as if they have just been placed on top of the image, they have to look like they are part of the scene, like they are supposed to be there. To achieve this, a clear and effective font has to be chosen which also represents the genre of the show.

How did your group plan to edit the title sequence? (consider timings, industry requirements etc.)

We tried to include as many titles as we could because usually they include up to 20 different titles; however, we had very limited time to complete this task and so we managed to do 5 titles. We chose a red font for our titles as we felt it matched the genre very well.

 Explain the creative decisions made by your group.

The main "Dexter" title is red so we chose to continue with this colour theme and we made all of our titles red as well. The colour red also made it clear to the audience that it was a thriller due to it's typical connotations with blood and death. We chose a simplistic and clear font so that the words were legible on top of the moving images. For some of our titles we had them so that they moved with the image, like when the tissue soaked up all of the blood, we made our titles fade away as the blood spread towards them. I thought this title was particularly effective.


How does your re-edit compare to the original?

I think that the original was much better than our re-edit as it included many more titles than our one did but we only had a very short amount of time and it was my first time doing a task like this and using the software we had to use. I think that if we had more time to complete our re-edit and do as many titles as the original had then it would have looked much better. The original titles were very professional-looking and stylish, they portrayed the genre instantly which is why the Dexter title scene is such a good one.


Sweded films.


A Sweded film is a low-budget remake of a well-known film where each scene is only shot once with minimal editing involved. Sweded films evolved from the film Be Kind Rewind, featuring Jack Black where the owners of a video rental store erased all of the video tapes and had to remake all of the films to give to their customers. As an excuse for higher rental fees and longer waiting times they had to say that the films were being shipped over from Sweden which is where the term "sweded" came from.


One of my favourite Sweded films is this remake of Inception because I think it was really well done yet still had comedic value. Their take on the special effects of the film were really creative and entertaining and I enjoyed watching it very much.

There are lots of good films that would be great to remake but our group decided almost immediately that we wanted to do a Swede of The Dark Knight. However, we found out that on YouTube there are already a few Sweded copies of this film so we are considering doing a Swede of The Dark Knight Rises, as this is a more recent film it is very recognisable and is widely popular, especially among people our age - who are our target audience.

Sunday 6 October 2013

Prelim task.


Our brief was to create a continuity sequence which involved filming and editing a character opening a door, crossing a room and sitting down in a chair opposite another character with whom she then exchanges a couple of lies of dialogue. We were supposed to demonstrate match on action, shot/reverse shot and the 180-degree rule.


Who did you work with and how did you manage the task between you?

For this prelim task I worked in a group of four with Gavin, Mahalia and Enya. Two of us were completely new to media and the other two were more experienced so we worked well in helping each other and bringing new and different ideas to the task. Gavin and Mahalia were our two actors in this sequence whilst Enya and I worked behind the camera. We all had a chance to use the camera and direct the scene, inputting different ideas for angles and movement within the shots. This was the first time I had used a camera to record a film so it was very new to me. We evenly shared out the responsibilities within the group and I feel that our group dynamics worked really well and the task ran smoothly.

How did you plan your sequence? What processes did you use? What theories did you try and take into account?

We planned our sequence by first deciding on a genre for our film and discussing a narrative which would best suit our brief that would also match our chosen genre (mock-thriller). After deciding how best to create a continuity sequence that fit our narrative we drew out a story board to help us visualise what each shot would look like, and who would feature in each shot. After we had established the order of our shots and the style and type of shooting each shot would need we had a group discussion about how well our sequence obeyed certain rules, such as the 180 degree rule, and how well our film would work as a continuity sequence once it was all filmed and put together. At this point in planning we would usually produce a shot list and a script however, we did not feel it was necessary to make either of these considering the fact that we only had two lines of dialogue and that our storyboard clearly showed what we were going to do. Before filming we went through our sequence, blocking what would happen in each scene. This helped us to visualise how we best wanted the shot to be set up.

The main theory we tried to take into account whilst filming this sequence was the method of continuity. I think that the continuity in our film was successful after the editing process. The group split into pairs to edit two versions of the film, I was paired with Gavin and I think that our edit flowed really well and there were no major jumps or glitches in the sequence.

What technology did you use to complete the task, and how did you use it?

The camera we used in this task was a Canon HV30 camera which for the most part of the sequence we mounted on to a tripod which enabled us to get steadier shots. We also used a shotgun microphone to pick up dialogue and Sennheiser headphones to help us check on the audio and see if the microphone was working properly. At some points in the task it was easier to use the camera hand held rather than on the tripod, especially in low angle shots where I had to lay on the floor to achieve the correct angled shot that we wanted.  The film was taped onto a mini DV tape and then uploaded onto a computer so we could import the footage into Cut Pro - a non linear editing programme. This is where we edited the clips so they were all the right length and there were no major jumps in the sequence and we had to arrange the clips so they were in the correct order on the timeline.
I hadn't used this software before and the film editing process was completely new to me, but after a brief tutorial it didn't take me too long to pick up the basics, with the help of my group.


4) What factors did you have to take into account when planning, shooting and editing?

There were different factors that we had to consider when planning, shooting and editing as there was a lot to think about during each process.

The factors that we had to take into account when planning were:
  • The continuity of our sequence
  • The setting of our shoot
  • Timing, and organising a time to use the space in which we wanted to shoot so we did not clash with another group's filming
  • Who was going to appear in each shot
  • Our time limit, and getting all of our shots filmed and the whole sequence edited within the short amount of time we were given
  • How well our narrative fit the brief
The factors that we had to take into account when we were shooting were:
  • The shot types, the angles and the movement of the camera, not breaking the 180 degree rule
  • Background movement - we had to ensure that there was no one in the back of our shots that we did not want there as this could ruin the scene and/or the atmosphere of the shot
  • The sound - we had to ensure that the dialogue was picked up and that there was no interference with the sound. At first we had some issues with the microphone and headphones as we couldn't hear anything, only a loud buzzing noise but this problem was quickly resolved
  • The narrative - we had to constantly refer to our storyboard to make sure that we didn't miss out on any shots and that the whole narrative flowed really well through each shot
The factors we took into account when we were editing our footage were:
  • Continuity was the main factor we had to consider when we edited our sequence. We had to choose the best shots and ensure that they were cut to a good length so that they didn't jump or suddenly cut. We wanted the continuity sequence to flow as best as possible so that it didn't confuse our audience and kept to our brief.

5) How successful was your sequence? Please identify what worked well, and with hindsight, what would you improve.do differently?

I feel that our sequence was relatively successful and it flowed really well after we edited it. However, I think that our sequence didn't follow the brief particularly well as we did not include much dialogue; more of a statement and a reaction which probably doesn't qualify as a conversation. Nor did we have our actor opening a door, as it was already open when she came into shot. Also, our two characters did not sit down opposite each other. Although these are quite minor things, they were still a part of the brief and so we should have followed it more closely. I think that perhaps we got too carried away with other aspects of the sequence.

If we had more time then we could have added the sound effects that we had in mind when filming the sequence. This would make some of the scenes much more dramatic and aid us in projecting our genre which I don't think was shown amazingly well.

Having said all of this, I am overly very happy with our final product. It was the first film I have ever shot and I have lots of fun in doing so! The continuity of the film was successful and I am proud of the sequence that we created.


6) What have you learnt from completing this task? Looking ahead, how will this learning be significant when completing the rest of your foundation coursework, do you think?
 
I have learnt very much from doing this task as it was my first ever media film task. I have learnt the basics of how to use a camera, how to plan a shoot and how to edit a film. I think that this learning will be very significant for completing the rest of my foundation coursework as without it I would not know what to do. In the next task I will most probably look at the brief more closely and put more time and thought into the planning of our sequence.

Thursday 3 October 2013


Summarise your film idea. Provide a brief synopsis and outline what happens in your film opening.

Our film idea was focused on one particular school boy who suffers from a mental condition called paranoia - hence the film title. The opening scene of the film follows the boy's daily school routine, beginning with his entrance into school, moving on to him at his locker, walking through the corridors and sitting in the assembly hall, among other shots. At the start of the scene our main character comes across as an ordinary school boy, the shot is quite bright and the scene has a positive feel to it. As the scene progresses, the shots get darker and darker as the boy's mental state starts to deteriorate and this is shown with the cracking effect on the screen. The cracks and rough marks on the screen get gradually worse as the scene moves on and by the end of the scene the shot is covered in these rough marks. This shows that the paranoia has completely taken over the character and he is in a different mental state to the one he was in at the start of the scene. The final shot shows the title of the film, very fitting to the scene so far and this brings the opening scene to a nice finish and very clearly shows what the genre of the film is - a psychological thriller.

What kind of information has been included in your film opening?

In our film opening we included the opening credits which showed the names of the actors, the director and the producer, among other important roles in the making of a film. The film opening did not give too much away and left a sense of mystery and suspense to the character and his situation, however we do find out that he is psychologically troubled and is a very lonely boy in a school environment. As well as establishing our main character and the setting of the film, we also discover the genre of the film which was quite clearly shown to be a psychological thriller.

How do the titles link to the main film idea?

The font we chose for the titles was very rough-edged, grungy and cracked which linked in well to the rough crack effect we used on the screen. This emphasised the uneasy and unstable state of mind that our main character is in during the film. The titles were positioned into the scene rather than just stuck in the middle over the top of our shots. The bold font makes our titles much more integrated into the shot in a way that they can be clearly seen but yet do not detract from the action on screen.

Identify three things that you included in your grid that are important in the construction of an opening sequence and explain their role in understanding the film.

  1. In our grid we included a wide range of shot types which made the opening scene much more interesting. We used mid shots, long shots, over the shoulder shots, and shots from directly above the character's head. These were all effective for different purposes and reasons; for example the long shots that we used, showed how alone and isolated he was with no one else around him.
  2. The titles we used in our opening scene were very bold and they fitted in very well into our shots and they definitely helped to establish the genre of the film which helps the audience understand what type of film they are about to watch.
  3. In our grid it was important to introduce the audience to our main character, it was important to do this as he was the only character included in our opening sequence which helps the audience to understand that the film will mainly revolve around him.
How effective is your project as a film opening?

I feel that our grid project was successful as a film opening considering the amount of time we had to come up with an idea, take the shots, edit and finish. The opening establishes the genre, the setting, the general mood to the film, a slight grasp of what sort of character we are dealing with and what sort of story is about to unfold.